Rebuild 08-09
Although the previous rebuild was running reliably, there were a couple of issues that needed looking at:
- Oil pressure relief valve sticking shut, giving very high oil pressures. This was the tadpole valve that was supposed to fix all these issues!
- Oil leak, possibly related to the above
- Noisy valvegear. This was because the valve installed heights weren't consistent, so the hydraulic tappets couldn't all adjust correctly
So I thought I'd take the opportunity to pop the motor out, and sort out these issues. Whilst at it, I decided to go for a MegaJolt Lite Jr. distributorless igntion system and 2" SU carburettors.
This web page just gives some of the highlights of the project rather than a blow-by-blow account of it
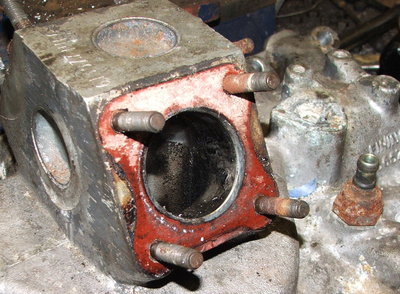
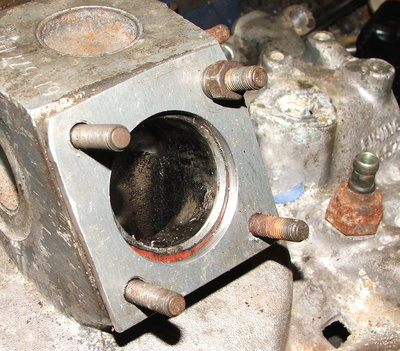
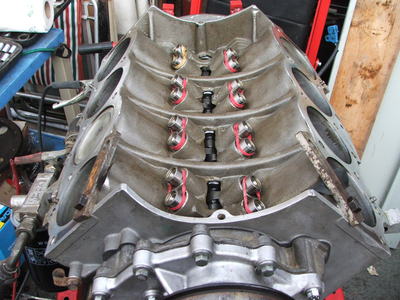
I decided to pressure test the block whilst in pieces
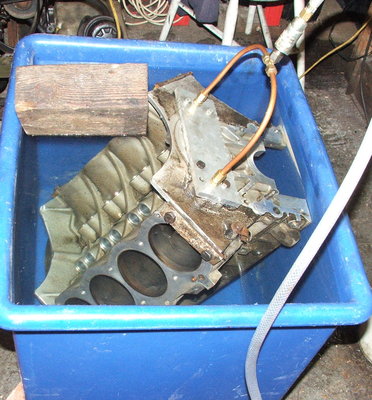 |
I gave it about 50PSI and looked for bubbles. Nothing. Excellent! I have another block which I tried this on, and got a ring of bubbles appear around one of the liners. I removed the liner, and sure enough there was a 1 inch vertical crack. Luckily this engine didn't have that problem.
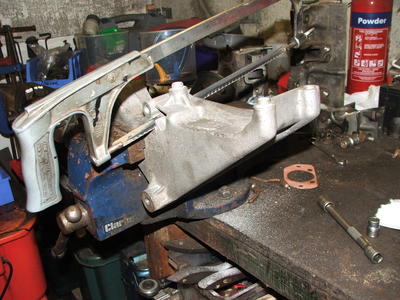
One issue with fitting the GEMS timing cover was the lack of clearance between oil pump and front axle
5.5" to the flange, with no weight in the front of the vehicle. Clearly no good. A remote filter is called for. Unfortunately there isn't even enough room for a sandwich type remote takeoff.
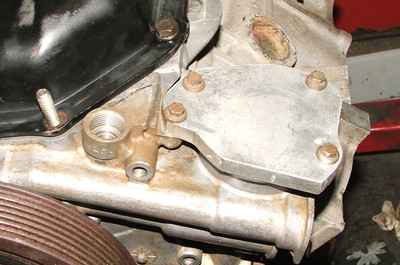
Fortunately there are at least two types of GEMS cover. I needed the one with the elbow to angle the oil filter. I could use the fixing holes to make a blanking plate where the oil filter would go, and use the oil cooler ports to drive a remote filter.
 |
 |
Of course, it's not as simple as that. Firstly the oil plumbing within the front cover is designed for use with an external oil thermostat, which can shut off the flow. So the external ports have a pressure controlled bypass which opens when the oil stat is closed. If I just put my external filter on those ports, then the bypass would probably be open! So I modified a bung and fitted that instead, so the bypass is permanently closed
 |
And for some bizarre reason, the oil outlet is right at the bottom middle of the cover. A right nuisance, so I needed to turn it around and in the shortest possible distance. Much web hunting, and I drew a blank. The thread is M20x1.5, which seems to be a standard Rover feature. However, aftermarket fittings are few and far between. I tried my local hydraulics specialist, Burley Hydraulics, and they were rubbish (more on them at the end!). In the end, we fabricated a bend:
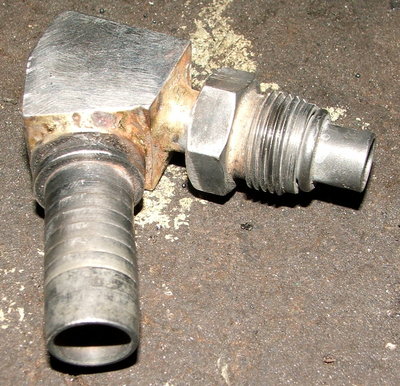 |
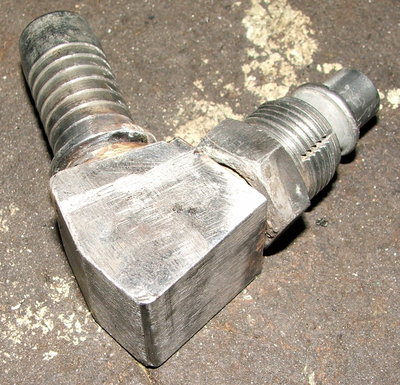 |
I wanted to use the Rover SD1 type oil pressure sensor and switch to maintain compatibility with the instrument cluster. So I knocked up this rather creative little extra:
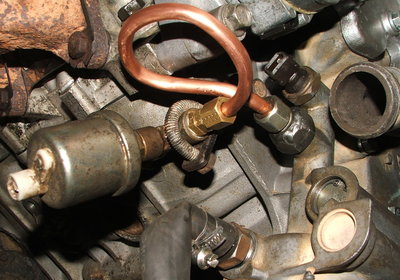 |
Part of the rebuild was to balance the rotating assembly. This turned out to be far more complicated than I thought! Basically you need to make sure all the pistons and rods weight the same, and that the rod ends are also balanced to each other. I tried pivoting the rods and weighing the ends individually on accurate scales, but couldn't get consistent readings. In the end, we just balanced the rods against each other, and worked from the lightest one. We balanced them to about +/-0.25g. The pistons and rings were balanced to 0.1g. One piston and rod were despatched with the crank, pulley and ring gear to Chesman Motorsport for balancing.
 |
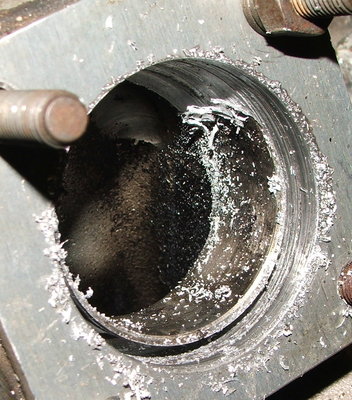
I gave the bores a quick rehone:
 |
It turns out that the piston-bore clearance should be about 1thou. Mine are somewhat more than that!, so we'll have to see if there's any unfortunate consequences.
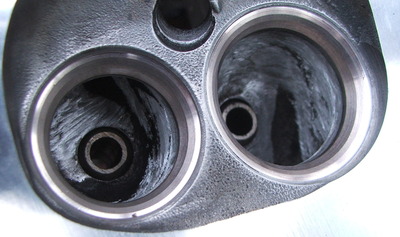
I decide to port the heads a bit, and reduce the valve guide insertion into the ports. This is a mockup, showing original guide length for comparison.
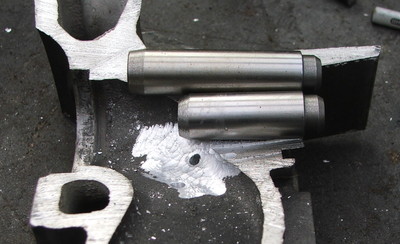 |
I also needed to ream a few of the guides after insertion:
 |
The finished article
 |
 |
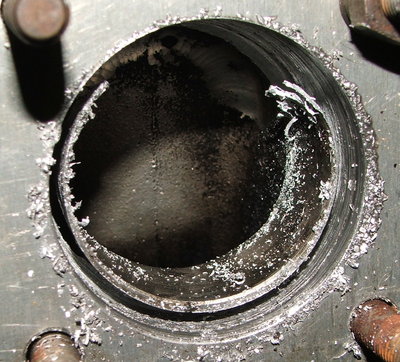
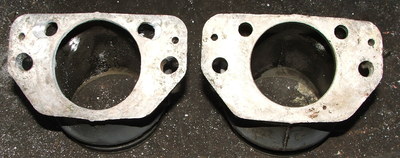
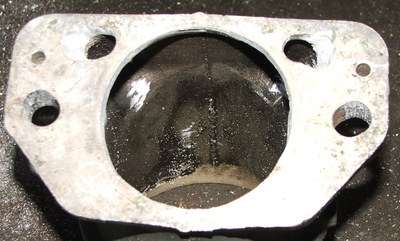
To fit 2" SU's, the inlet manifold needs some porting out. I used a holesaw and a guide plate (after getting it wrong and drilling into the water jacket!!
 |
 |
 |
 |
 |
And I forgot to take a picture of the completed manifold!
The gentle elbows that fit on the intake of the carburettors can be made up by modding some 1-3/4" SU types. The holes just need some work with a Dremel:
 |
 |
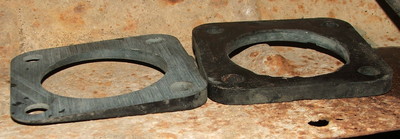
The carbs also need tilting slightly so the jet clears the rocker covers. This can be acheived by sanding the black heat-blocking spacers:
 |
So you end up with this: (note the large elbows need some cutting & shutting too
 |
 |
With the MJLJ, most people weld a trigger wheel to the crankshaft pulley. Instead I decided to use the standard GEMS ring gear. Naturally the 'missing tooth' is in the wrong place, so I redrilled the holes to get the index in the right place.
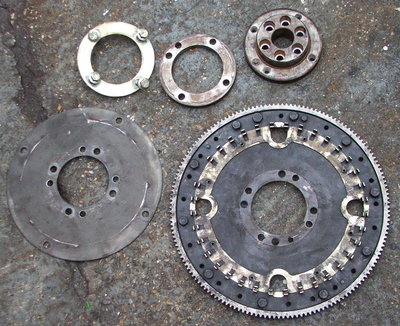 |
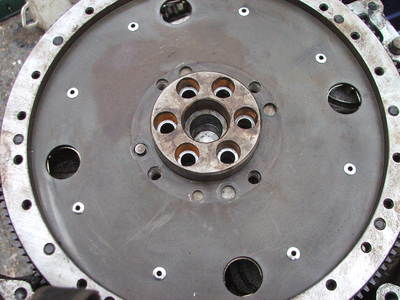 |
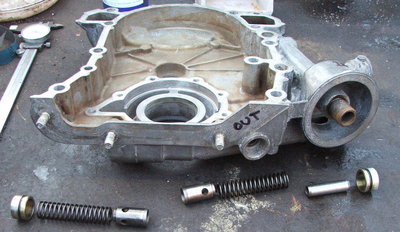
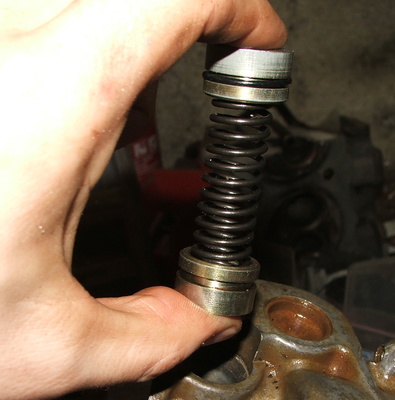
This is how you prime the oil pump without potentially damaging the tappets. It is all because you have to turn the crankshaft, so the camshaft will turn. The rubber bands hold the tappets up out of the way.
 |
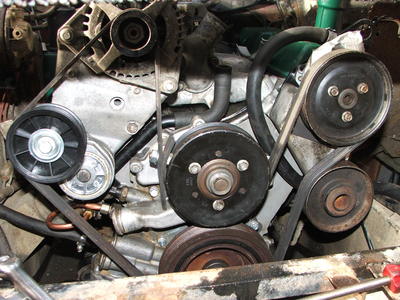
I had all the ancillaries for the GEMS cover, however I don't have the width for the air-con pump. It seems that the non-aircon models still have this huge bracket. So I cut the bracket in half!
 |
 |
And the final belt arrangement is this:
 |
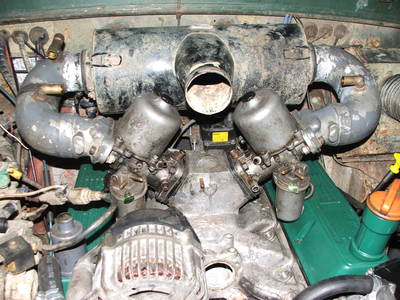
This gives the following side view
 |
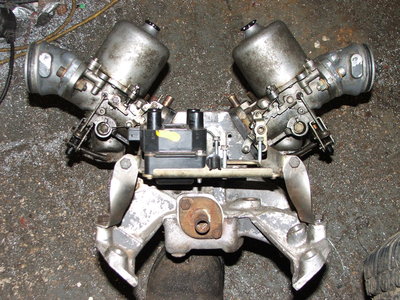
The 2" SU's and coil packs look like this:
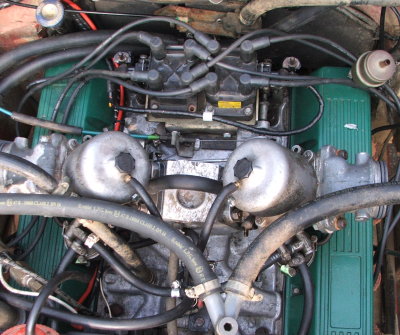 |
I think that the Thor inlet manifold mounts the coils the other way up, but I thought that access would be a bit easier that way.
Whilst I had the rocker covers off for some work on the breather system after 100 miles, I decided to check that all the valves were lifting properly
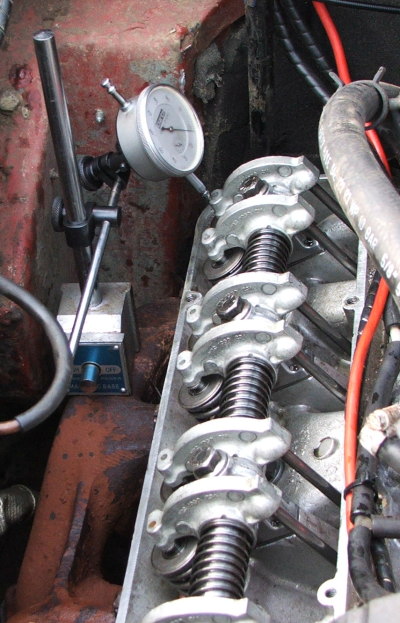 |
It's quite hard to do this as the hydraulic lifters bleed down quite noticeably!
More to follow...
Some awards are appropriate for the good & bad suppliers
Golden Spanner awards go to
Chesman Motorsport for doing the balancing. I also had a few interesting conversations with the chaps there whilst dropping stuff off and collecting. They've got the kind of workshop I'd love!
Pirtek for doing the hydraulic hoses for the PAS stuff quickly and cheaply
St. Ives Engine Services for doing me a head skim and cutting the valve seats to all the same height. A back-street garage that knows their stuff
Chrome Vanadium Spanner awards go to
Trigger Wheels for the EDIS-8
Autosport labs for the MegaJolt Lite Jr
Rimmer Bros Although a bit expensive, their website is great for putting in the Land Rover part numbers
Wooden Spanner awards go to
Burley Hydraulics I visited this crowd to try to get an M20x1.5 onto 5/8ths bore flexible hose fitting. They managed to cobble something together, and since I was desperate I bought it. £70!. And with the amount of umm-ing and aah-ing, you'd have thought I'd asked for the earth. Relucantly I returned when I needed a PAS hose making. Lots of sucking of air through teeth, comments like 'ooh, that's automotive isn't it' They reckoned that the pressure in a PAS hose is too high for their stuff, which is clearly nonsense! In a nutshell they didn't want to do it. I for one will never be going there again
